- Drain chickpeas and set aside. You may want to save some of the chickpea water to thin out the dip if needed....though I didn’t.
- Roast the peppers and garlic. I cut them in quarters, remove all the seeds, and then lay them skin side up on a baking tray lined with parchment. Place the garlic cloves (remove most the outer peel but leave the last layers on) in a square of foil, drizzle with olive oil and sprinkle with a pinch of salt, close foil over garlic to make a little pouch, and place on the baking tray with the peppers. Place in a 200C oven until the pepper’s skin is black and blistered in place. Take the peppers out, place in a bowl, and cover with cling wrap. Leave to cool slightly. Take your garlic our and poke with the tip of a knife to see if it’s soft. If it’s not, return to the oven to roast some more until soft. When the peppers are cool enough to handle, gently peel off skin (it will come off easily at this point) and set aside. When the garlic is soft, squeeze out of skins and set aside. This can both be done ahead of time.
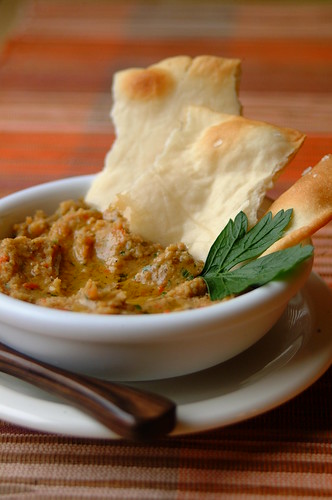
- In a food processor place chickpeas, roasted red pepper, roasted garlic, parsley, lemon juice, baharat, salt and pepper, and pulse until chopped up finely and mixed thoroughly. Add a couple of glugs of olive oil (depends on your taste and how smooth or chunky you like the dip) and pulse again. Taste and adjust seasoning, and pulse until you reach your desired consistency. If it’s still too thick you can add some of the chickpea liquid, although I didn’t.
- Spread on a shallow bowl and drizzle with extra virgin olive oil to serve.
I loved the challenge of cooking vegan and gluten-free. A different challenge from the usual, but a challenge still...and one that gives us a little glimpse into the lives of our friends who enjoy different eating habits, which makes it even more meaningful and fun in my book :)
Note: In case you are wondering why there are only three crackers in the photo, it's because we finished pretty much everything the night before and it was too dark to take a picture then!
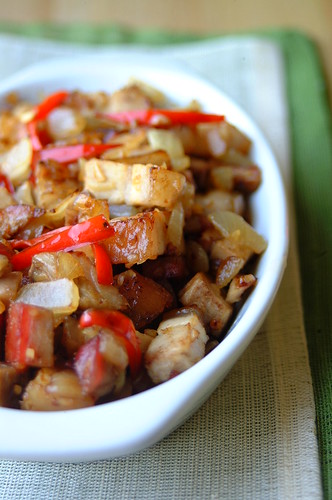
- Heat a litle oil in a skillet then add garlic, onions, and red bell pepper. Sauté until onions and pepper are soft.
- Add chopped pork belly and sauté further until edges are a little browned.
- Add freshly cracked black pepper, soy sauce, and then quickly toss. Take off the heat.
- Serves 2 with a bowl of steaming rice. Or with this.
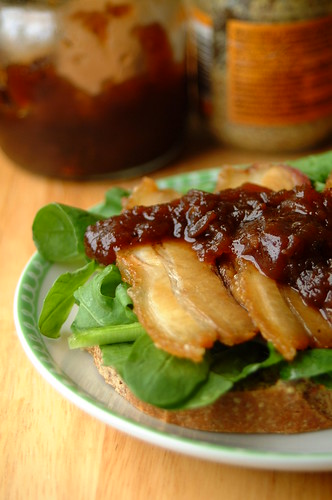
Pork belly is a cut of meat I adore. It doesn’t take a genius to know I love pork, and its belly is the start of so many beautiful things. A popular way to prepare it locally is simply sliced and grilled – inihaw na liempo. It’s also my favourite cut for roasting, which I discovered when making porchetta. The layers of fat keep the meat tender and juicy during a long slow roast. And, lest we all forget, this is where bacon comes from! These leftovers came from a pork belly I slow-roasted flat. The meat was succulent and tasty but there was no way we could finish it in one sitting, so this is what I served the next day.
Another brilliant thing about pork belly is the price. The piece we got for the original roast went for less than the price of one steak! And lasted for 2.5 meals instead of 1 (more on the .5 later)! And I certainly did not feel bereft while I was eating it :)
So, let’s recap: Using leftovers – check! Saving money - check! Still enjoying delicious food – check!
Next up, what I did with the last of the roast pork belly leftovers! Until then, happy weekend everyone! :)
- In a nice and roomy soup pot, heat a couple of glugs of olive oil. Add the garlic and onions and sauté until onions are soft.
- Add chorizo, ham bits (if you’ve got them) and fry until the chorizo is cooked and the nice orange oil is all over the place. When it’s all sizzling, deglaze the pan with white wine and scrape up all the stuck bits.
- Add tomatoes, pimenton, oregano, and black pepper, and simmer until thick and pulpy.
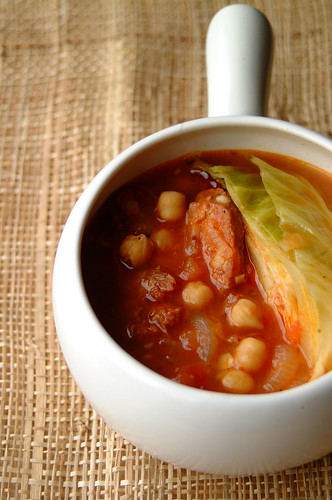
- Add chickpeas, give it a few stirs, and then add stock and water. Simmer for about 15 minutes, stirring occasionally, until all the flavours blend. Taste and adjust seasoning.
- When it’s just about done, add cabbage, cover pot, and cook until cabbage is soft (about 15-20 minutes), checking occasionally to make sure it doesn’t scorch. Taste again and adjust seasoning if needed.
*Use a whole cabbage only if you are a fervent cabbage-lover like I am. The whole cabbage really takes over the pot and the soup becomes very chunky, but this is how I like it. I figure a half cabbage or so will do for a soupier soup.
This soup was inspired by a recipe I found in Donna Hay magazine issue #38 for Cabbage and Chickpea Soup. I added the chorizo and changed the procedure...and this was the result! It’s now in our “regular dishes” notebook (a furry purple one given to me by my godchild) in between the chilli and my mom’s tortilla de patata. This is a robust soup that makes a good meal in itself, maybe with some nice bread (the type you buy from the French guy at your market) . It is particularly good when it’s raining (as it has been this week). Or if you are in need of coddling after a sweaty gym-episode that left you with a blister on you right ankle.
So, did I feel those much-lauded endorphins in the gym? Let’s just say I felt more toe-curling satisfaction from this soup than from being on the machine. But, I do admit I need more action (the moving around type) in my life. I just hope to find a less gym-involving action before I run through all the songs on my iPod.
- Place the sugar and cinnamon on a plate and mix.
- Place the flour and the extra sugar in a bowl and mix to combine.
- Place the eggs, cream, and milk in a separate bowl and whisk to combine.
- Gradually add the egg mixture to the flour mixture, whisking until smooth. Allow to stand for 20 minutes.
- Heat a lightly greased non-stick skillet over medium heat. Add 1/3 cup of the batter and swirl to cover the base of the pan.
- Cook crepes for 1-2 minutes in each side until golden. Place on non-stick baking paper and repeat with the rest of the batter (or just make the amount you need and place the rest of the batter in the fridge like I did).
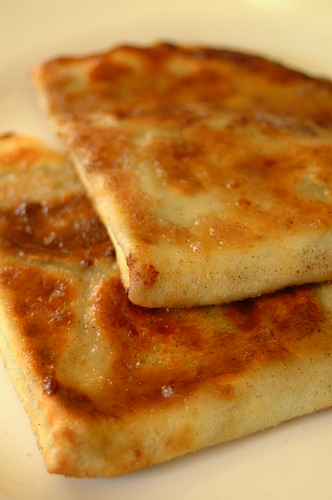
- Sprinkle 1 tablespoon of chocolate over each crepe, fold in half, and then fold in half again. Brush both sides with melted butter and press into the cinnamon sugar mixture.
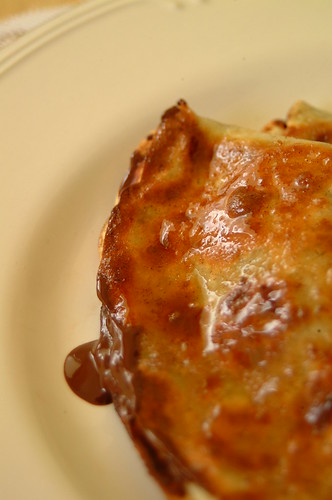
- Cooked the sugared crepes in a lightly greased non-stick pan (high heat) for about a minute on each side, or until the sugar is caramelized.
The combination of the dark chocolate and the subtle cinnamon flavour was perfect! But what really takes this over the edge into goodness oblivion is the caramel-ly exterior, all sweet stickiness and crunchy edges. I can see this being a fantastic dessert but, being a creature of breakfast, I had it in the morning with my coffee...bliss! I’m sure it’ll be great with a bit of vanilla ice cream too!
The recipe I have posted here is my halved version. I made two crepes for my breakfast and then used some of the batter to make smoked salmon rolls (with cream cheese, sour cream, dill, capers, and green onions) for a casual night of drinks at our flat. I know the batter is supposed to be for a sweet crepe, but the crepes themselves weren’t sweet at all so I thought it would be fine to use for a savory appetizer. Be that as it may, I was still left with a little batter that eventually had to be tossed :( So to any pancake/crepe experts out there I have three questions:
1) How long can you keep pancake/crepe batter safely in the fridge?
2) Any other variations you like? Savory and sweet suggestions are welcome!
3) Do you have a really low yield pancake/crepe recipe? :)
Hay Hay It’s Donna Day is a food blog event celebrating Donna Hay’s special yet simple dishes (I love Donna!) and was created by Barbara of Winos and Foodies, and is now under the expert care of Bron of bronmarshall.com
Or what happens the morning after a Mexican dinner.
I’m sure no one is a stranger to having leftovers from the night before for the next day’s breakfast. Dinner recycling is quite common unless you are lucky enough to have someone make you breakfast a-fresh every morning (if you are that lucky perhaps you’d like to invite me over!). I try my best though...and you see the result of these efforts in the breakfast posts on this blog. The rest, sadly, do not often see the light here.
You see, it’s usually the pretty looking, delicious sounding, recipe-included dishes that make it to publication. If I included leftovers and those madcap creations I winged together last minute (although delicious as well) I would have a lot more posts. In reality, we don’t dine on a new dish, from a new recipe, every night. A lot of what graces our dining room table are meals put together quickly and with no specific recipe, or leftovers from a previous dinner. And I am not particularly excited about posting those (although some of those wing-it dishes are really good...they just have no recipe yet, so still undergoing more testing!).
Times are changing though. Food costs are going up. At the same time, more and more food is being wasted every day. Goodness knows I am guilty of that crime myself. So I’ve decided to post some of my leftover recycling :) This way, I challenge myself to find more means to use up my leftovers, reduce my food waste, and exchange ideas with all you brilliant people out there!
And the great thing about leftovers for breakfast? Everything is already prepared! You can throw this together in three minutes with your eyes still bleary from sleep!
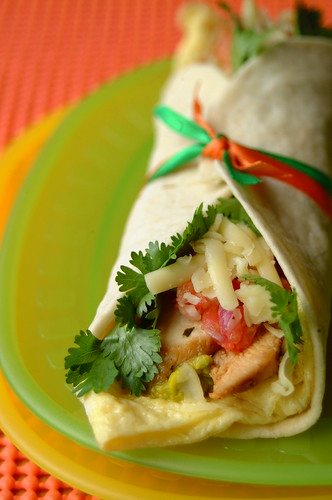
We had a Mexican dinner the night before of chilli con carne, chicken fajitas, homemade salsa, and guacamole. C is a huge (HUGE) fan of Mexican food. Because of the sad lack of Mexican restaurants over here (a big mystery that), we try to have Mexican dinners at home every once in a while, and this was one of those nights. Reaching into the fridge for my yogurt the next morning I decided to gather the leftovers instead and stuff them into a tortilla wrapper with some egg for a yummy breakfast burrito!
Here’s what I did: Take one egg and lightly beat it. Pour into a hot, greased skillet and spread the egg out as thin as you can (like making a crepe). Flip when underside is done and lightly cook the other side. Lay egg on a tortilla wrapper. Pile on the goodies you had for your Mexican dinner last night. I used guacamole, chicken for the fajitas, salsa, grated cheese, and cilantro sprigs. Wrap it up. Enjoy!
Leftovers, just like the fashion from the 80’s and 90’s, are no longer garage sale fodder. They are hip little numbers sashaying their way across our closets and plates. Unlike 80’s fashion though, making leftovers new again helps our grocery bill and our environment! Need more inspiration? Just go over to that search box in my sidebar called Food Blog Search and type in “leftovers”...you will see what I mean :)
Some of my leftovers that did make it to posts:
- Make a little sachet for your spices. You can use a coffee filter or cheesecloth (I use empty tea sachets you can get at the Coffee Bean). Place the spices in your sachet and tie closed with some butcher’s string. If I were you I would make several already and store in an airtight container for future use.
- Place sachet in a saucepan. You can tie one end of the string to the handle so you can easily pull it out later. Pour in the milk and set over medium heat.
- Just before it comes to a boil, lower the heat and gently simmer until the milk is infused to your liking (about 5 to 10 minutes). Stir in honey to dissolve.
- Stir in oats and cover. Leave over low heat until cooked and thickened to your liking, peeping in to stir once or twice to make sure it doesn’t stick to the pan.
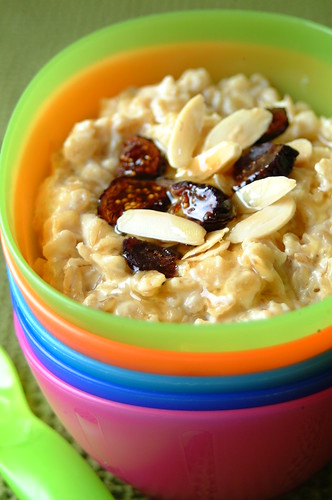
- Serve hot. I sprinkled dried figs and toasted almond slivers on top but feel free to experiment with toppings! Serves one.
I love oatmeal (don’t laugh...there are many of us out there) and I love chai. It’s no surprise then that I was absolutely smitten with this. It has the down-home, comfort factor of oatmeal coupled with the almost hypnotic fragrance of chai spices. It may be my overactive imagination but this felt totally therapeutic to me...like the aromatic spices where helping me center my thoughts while the familiar oatmeal was telling me that everything would be alright.
Does that sound slightly barmy? I don’t think so. Each of the spices here have a history of healing in some form or other, and have been used by early civilizations both medicinally and gastronomically. Aside from that, as I always like to imagine, once upon a time people set sail across vast oceans and into the unknown for these spices....the lure of their mystical fragrance pulling many an adventurer (and fortune-seeker!) to faraway lands.
Every time I have something redolent with these spices, I feel like I am a part, albeit a teeny-tiny one, of that fantastic adventure.
Never underestimate the power of a great breakfast (and a great imagination!). Therapy never tasted as good (or was this exciting!)...nor came as cheaply :)