Weekend Herb Blogging: Lemon Thyme

title

I was out one evening with a fabulous and worldly uncle. I said something which must have seemed charmingly (I hope!) naïve and dewy-eyed because he turned to me and said, “Oh my god! You are even worse than a hopeless romantic…you’re a hopeful romantic!

A hopeful romantic? I guess I could do worse…

I suppose it was the hopeful romantic in me that stopped by the plant vendor’s stall at the market to look at the little herb pots. I suppose it was that same hopeful romantic that led me to this little one and to inquire about her with the amiable purveyor. Perhaps it was this hopeful romantic that stubbornly believed I could make things grow in my apartment where I have nary a plant box, much less a balcony, much less a garden…where I can’t even open the windows because of the dust. And I’m sure it was this same hopeful romantic who went ahead and purchased the plant when she heard it was lemon thyme (lemon thyme!) and blithely “forgot” the fact that a thyme plant had suffered tragic death in our flat.

But isn’t she lovely? And she smells wonderful!

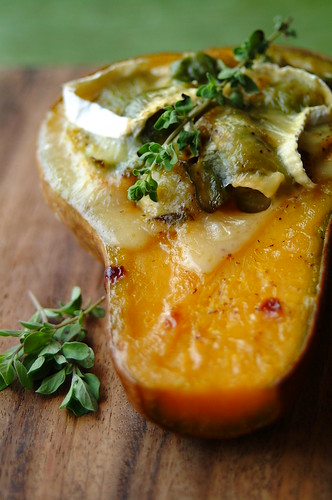
Lemon Thyme (thymus citriodorus) is a hybrid thyme that has a gorgeous lemony scent and, I’m assuming, flavor (I haven’t tried it yet!). I think it would get on great with fish and chicken, and just about anything you can imagine both lemon and thyme in. It looks like regular thyme but the leaves are edged with a light yellow border. Like regular thyme, it thrives best in full sun, so I have positioned it on a stool by the window, with the blinds angled to beam the sunshine on it.

Lemon thyme also has many medicinal benefits. Some of these are: anti-ageing properties, relieving muscle spasms, aiding the immune system, easing digestion, relieving asthma, and promoting relaxation.

You can find out more about lemon thyme here and here.

If anyone has any tips for caring for this plant your suggestions are exceedingly welcome!

So let’s see…looks pretty, smells good, most likely tastes good, and it’s good for me! Plus I now have an entry for Weekend Herb Blogging*** that actually involves my own herb…which I incidentally bought during the weekend. Now if only it lives long enough for me to be able to harvest a few sprigs, then I’ll have a recipe (or two, or three) to go with it. Here’s hoping!!! :)

back to school ***Weekend Herb Blogging is an event created by Kalyn of Kalyn’s Kitchen and she is hosting this week’s round as well :)

Yay! I rock!

back to schoolI rock! At least according to my dear, dear friend Christine (Nena to me) of Ramblings from a Gypsy Soul who thought I deserved this Rockin’ Girl Blogger badge :) I am honored and extremely flattered. Especially because I happen to think Nena is one rockin’ girl herself! Her travel adventures which she journals in her blog never fail to inspire. Any place she visits, she goes with wide open eyes and an open heart, ready and determined to experience all it has to offer, as fully as she can. Then she comes home and tells us all about it in her inimitable style through her captivating posts. And if that wasn’t enough to be rockin’, she also whips up delicious dishes. Believe me, I have tried her cooking so I know :)

So, Nena, back at ya girl! You rock!!!

Here are a few others who continuously prove to me that girls rock:

Barbara of Winos and Foodies – I’ve been reading Barbara’s blog for quite some time now and she is incredible! Even when tough times come her way she remains a force to be reckoned with, a great lady with such positive energy one can only hope is contagious. She shares herself generously with her readers (and the community beyond!) through her colorful posts and by creating (my favorite!!!) events like Hay Hay it’s Donna Day and A Taste of Yellow (for cancer awareness).

Veron of Veronica’s Test Kitchen – From giving us loads of wonderful recipes annotated with her diligent notes (you cannot go wrong I tell you!), to a chart explaining how many layers there are in puff pastry, to sweating it out in CIA bootcamp, this girl is everywhere, doing everything! And she rocks at facing her kitchen fears! Bravo :)

Ari of Baking and Books – Juggling a number of jobs and projects, posting mouth-watering recipes, interviewing cookbook authors, reviewing books…it’s all in a day’s work for this dynamo! Her full life is something I aspire to :)

Freya of Writing at the Kitchen Table – Freya’s (ok Paul you share in this too!) posts are a pleasure to read. Never mind that the dishes make me so hungry that I have to root around my cupboard for something to eat at 12 midnight, her clever wit and addictive storytelling had me all-ears from the first time a came across her blog. Never fails to put a smile on my face!

Ivonne of Cream Puffs in Venice – What would food blogging be without this charming Cream Puff? The amount of deliciousness that pours from her blog is mind-boggling! She has also done interviews and featured cookbooks, so there is always something new that keeps readers coming back for second helpings :) And she is also starting her own baking business! You go girl!

I never cease to be amazed by the amount of fabulous women that I have come across through blogging. Aside from the talented ladies above, a number of them Nena already mentioned (check out her rockin’ girls!), and there are many more out there if only I had the space and time! A hug to all the girls out there! You rock and don’t let anyone tell you different! :)

I am Curacha (con salsa Alavar)

title
As I can see in the comments of my last post, a bunch of you already guessed that my crustacean visitor was a curacha from Zamboanga. It’s always a thrill to see such passion for local crustaceans. I’d love to give out prizes but I hope you will all be happy with a virtual-pat on the back for now…PAT-PAT :)

So yes, this not-so-little beauty is a curacha! (I have to point out here that many find this crab to be horrible-looking and scary, but that is a matter of perspective I think) It’s a very popular deep-sea crustacean found in the waters of Zamboanga, a province in the southern part of the Philippines, where spectacular seafood abound. It is likened to a cross between a crab and a lobster. Whether raw or cooked, it’s this brilliant reddish color. They say that curacha can only be found in the waters around Zamboanga, however, it seems that they are either the same as, or at least related to, the spanner crab or red frog crab that can be found in east and west coasts of Australia. Whatever the case, they are delicious and I am happy to share their provenance with my friendly Australian neighbors :)

I first tried curacha during a trip to Zamboanga in 2005 to visit my then-boyfriend’s (now-husband) hometown and, much to my surprise and delight, also to get engaged! Although the proposal was the highlight of the trip, the awesome seafood was also part of the wonderful experience that is Zamboanga. I am a big lover of crustaceans so I was eager to try the much-talked-about curacha and it did not disappoint. Unlike most crabs whose majority of meat can be found in their claws, the mother-load of the curacha’s meat is found in its body (although the claws also have meat). This one pictured here easily fed C and I to nirvanic fullness!

This fellow (and three of its siblings) arrived on our doorstep care of my father-in-law, who sent them from Zamboanga. He boils them fresh from the market over there, then freezes them and sends them to Manila. To say I was excited to receive them is an understatement. As I happily re-packed them in Ziploc bags (one in each gallon sized bag!), I already had the perfect way to prepare our first one. Another of C’s generous relatives gave us a kilo of Alavar sauce. A popular culinary highlight of Zamboanga, Alavar sauce is a deliciously secret blend of coconut milk and spices served and sold in Alavar Seafood Restaurant. Curacha with Alavar sauce is a dish not to be missed when visiting Zamboanga, a veritable institution really, so of course I had to prepare my first curacha this way.

title
Curacha con salsa Alavar*
  • 1 large curacha, boiled until just done (do not overcook!)
  • 500 grams Alavar sauce (approximate – depends on how sauce-y you want your dish…just a tip, the extra sauce is amazing on steaming hot rice!)
  • 1-inch piece ginger, peeled and sliced
  • 4 cloves garlic, roughly chopped
  • 1 medium onion, chopped
  • 1-2 pieces sili pangsigang (long green chili – other chilis can be used, just adjust to your own heat factor)
  • Vegetable or canola oil

- Chop curacha in 2-4 pieces (first slice in half lengthways, then cracking it widthways is easy…which you can opt to do or not). Remove “lungs” (those weird finger-like things you also find in other crabs) and discard. Set crab pieces aside.
- Heat oil in a large wok or kawali. When oil is hot add garlic, onions, ginger, and chilis and sauté until onion is translucent.
- Add Alavar sauce and sauté for a few minutes until flavors meld and sauce is bubbling a bit.
- Add curacha pieces and toss until heated through.
- Serve immediately with hot steamed rice. Serves 2.

A few notes:
- I already had pre-boiled curacha, so this recipe reflects that. I’m sure it would be even better to cook the curacha directly in the sauce.
- Although Alavar sauce is delicious, I like to punch things up by adding extra spices and chilis.
- This is my first time to prepare this and I’m very open to suggestions!

If anyone out there makes it to Zamboanga, you must try this! Or if you have access to curacha and Alavar sauce in Manila (I hear they have a branch in Quezon city), make this dish post haste (although I’m sure if you have access to both then you already have made this)! The curacha’s body is filled with sweet and succulent meat. Just like the last time I had it, every time I poked my fingers in the shell more and more of the luxurious meat came out. It really is as good as all that. Aside from coconut milk and “secret spices”, Alavar sauce supposedly also contains crab fat. Now imagine that for a moment…crab in crab fat. Wait, it gets better (or worse, depending on perspective). As we are devouring this meal, C suddenly bursts out, “Omg! I think I found the aligue (crab fat)!” So make that crabfat found in the crab cooked in crabfat. There is only one place for that…on my rice!

I will leave you now to imagine what we looked like after this meal. Full to bursting, crab bits all over our hands, Alavar stains on our mouths, and a little bit incoherent. Not such a pretty sight let me tell you. Then again, that’s a matter of perspective.

*This is not Spanish. It's Chavacano, Zamboanga’s native dialect :)

Guess who's coming to dinner...

title
Speaking of food gifts…look who landed on my doorstep recently! Isn’t she (he?) cute? Ok, perhaps “cute” is not exactly the word that this creature calls to mind.

Do you know what she (he?) is? Can you guess?

A clue: She (he?) took a plane to reach me!

Recipe post to follow soon…meanwhile, have a fabulous weekend! :)

Breakfast #10: Scrambled Eggs with Asparagus & Camembert

title
I love getting food gifts. I don’t know if that sounds greedy or trite or just plain obvious, but I just love them. Food gifts give me a warm expectant thrill that can plant a smile on my face all day. Not just wonderful homemade goodies, but also food brought back from trips. Nothing too fancy, just a simple, well-chosen item that recalls a part of the trip at a totally different level from what a photograph captures -- something three-dimensional that brings back a little smell and taste and texture.

I already mentioned this gift before, as part of the Brussels Sprout Gratin that I made in a butternut squash half. The deliciously pungent round of camembert de Normandie brought back from France by K’s husband, L. Unlike most commercially produced camembert, Bernieres Jort camembert is made with raw milk hand-ladled into their molds (au lait cru muolé à la louche – the proud testament stamped onto their wooden cases). This is what gives each camembert made in this region its distinct taste and robust character that lingers sexily on your palate.

When C and I first received the coveted package we rationed out little slices to each other, plain or with a little bread, not wanting to distract from the taste. Then I started experimenting, pairing it with my dad’s homemade mango jam for a luscious and melty jam and cheese panini, making myself little canapés with the camembert topped with a dollop of strawberry jam and sprinkled with pine nuts, and of course, the Brussels sprouts gratin.

And now it was time to have some for breakfast! Yes, breakfast, my friends…my favorite meal will hopefully be revived in the pages of this blog. No guarantees and no promises, but let’s start with some scrambled eggs…

title
Scrambled Eggs with Asparagus and Camembert
  • 2 eggs
  • 5-6 stalks asparagus
  • 2 slices camembert
  • a pat of butter

- Break the eggs into a bowl and whisk lightly.
- Break off the tough lower portion of the asparagus stalks and discard (or do what I do – keep them in a ziplock bag in the freezer until you have enough to make some vegetable stock). Slice the asparagus into 1-inch pieces.
- Melt a pat of butter in a skillet. Once the butter is melted, toss in the asparagus. Lightly sauté the asparagus until just cooked – just beginning to get tender but still with bite.
- Pour your eggs in and quickly remove the pan from the heat. Stir the eggs gently off the heat until they start to come together and set. If you think you need more heat or they haven’t set enough to your liking, place pan back on the heat until they do.
- When just about done, place the slices of camembert on the eggs and immediately transfer to a plate.
- Enjoy with a slice of toast. Serves one.

I like my scrambled eggs wet-ishsoftly set curds nestled in creamy yellow eggy-ness. For this dish, I didn’t even need to put the pan back on the heat. The existing heat of the pan cooked the eggs exactly the way I like them. The rich creaminess of both the eggs and the cheese melting together made this simple breakfast luxurious and decadent. The asparagus’ bright green crunch reined it all in perfectly. If you really want to go over the top, try drizzling a bit of truffle oil on top.

Thanks L for the little bit of Normandy that we enjoyed to the hilt! I’m lucky to have such kind and thoughtful friends :)

Bagnet with Bagoong Fried Rice

title
My pork-loving heart was lucky enough to come by some authentic Ilocos Bagnet, brought back by a generous friend who had come back from a whirlwind trip to the region. Bagnet is a deep fried pork dish from the Ilocos Norte region of the Philippines. It is sometimes called Ilocano Chicharon…a sure sign that I’d love it (as I love chicharon). Unlike chicharon though, bagnet is made with one whole big hunk of pork belly. I’m no expert, and I’m sure there is more than one way to prepare it, but based on what I’ve been able to gather, the piece is boiled in its entirety for about an hour with certain herbs and spices, then dried in a hot oven, then deep-fried in low heat for another hour. After this you can either cut it up into smaller chunks, or leave it whole, then deep-fry again, this time at high heat, until golden brown and crisp. Whoa. Yeah.

Thank goodness they have commercialized bagnet to a certain extent so that girls like me don’t have to go through watching something deep-fry for an hour (never mind the boiling and the baking). You can now purchase a hunk of bagnet, from good and authentic purveyors, after it’s first long deep-fry. You can then keep in the fridge for a couple of weeks, or in the freezer for longer. Anytime you need a fix, you simply hack off part of it and do the last, quick and hot deep-fry until it becomes golden brown and super crispy. I like to think of it as “fresh” chicharon.

Now, with that hunk of pork goodness in my hands, what was I to do with it? I have had bagnet before, with loads of bagoong balayan (fermented fish paste). I already loved it back then, and would eat it until my lips were itching from the bagoong balayan (I have no allergies, but bagoong balayan packs such a strong wallop, that even non-allergic people sometimes get itchy lips).

I wanted to try something different now. I had just made a big batch of binagoongan baboy (a Filipino dish of pork stewed in shrimp paste) so I decided to set aside some of the sauce for the bagnet. I now had a thick tasty sauce of bagoong stewed for hours with a ton of tomatoes, onions, garlic, and the juices of the pork. After I saw this post though, I realized that the sauce would only make the bagnet soggy…and if there is one thing you want bagnet to be, it's crispy, not soggy. Hmmm…think Jo…aha...fried rice!

There are very few food challenges that can’t be solved by fried rice, and that’s what I decided to do here. By making bagoong fried rice, I could have my bagnet in all its pure crispy glory, while having my bagoong “on the side” in the rice. I used my leftover binagoongan sauce to make fried rice by first sautéing some garlic, then adding the sauce, and then the rice. This is an excellent way to use up extra binaggongan baboy sauce if ever you have any. I then prepared a side salad of chopped tomatoes, onions, burong mangga (fermented or brined unripe mangoes), and cilantro. Preparing the bagnet was just a matter of cutting it up and deep-frying until golden.

The cool, fresh, sour crunch of the salad, with the cilantro’s bite, was a perfect compliment for the fatty pork. And the bagoong rice was a great new way to have the baggong with the bagnet. What a meal! I was ready to pass out with the pleasure of it! I dunked the bagnet in my spicy vinegar mix, and really, when my teeth went through the crisp skin and glorious fat I nearly forgot my own name! I swear it!

Thanks MM for bringing this big piece of pleasure from the North back down for me! You can rest assured that its magic did not go wasted :)

Espresso Granita

title
I’ve just missed a deadline. Yesterday was the last day for entries for Hay Hay it’s Donna Day, hosted this month by Laura of Eat Drink Live. Between work and the weekend it sneakily slipped by me (naughty, naughty) without my noticing. That doesn’t mean I hadn’t planned to make something to fall under Laura’s refreshing theme for this round – sorbets.

The only hitch was the small (tiny really) fact that I don’t own an ice cream maker.

Sigh…my longing for an ice cream maker has grown from an easily ignorable little itch, to a full-on, sirens-blazing pandemic. It’s getting harder and harder to breeze by the KitchenAid ice cream maker attachment unaffected. To add fuel to the already towering inferno, C-who-doesn’t-really-eat-sweets declares, “Of course I’ll eat ice cream

But I’ve also got my eye on a Dutch oven and methinks it’ll have to be one or the other…

So unless Santa comes to town early I will have to stick to something a tad easier…a granita. Now what exactly is the difference between a granita and a sorbet. I checked here and here, and I think the main difference is the texture: a granita being more crystal-y and a sorbet being creamier. The sorbets also seem to lean more towards fruity. I would have loved to make some kind of tropical mango or coconut sorbet (buko sherbet…mmm!), but the weather has been so strange lately -- hot and sticky one minute, then rainy and wet the next – that I was in no mood for a sunny tropical treat. I opted instead for something icy and strong…and easier to make without gadgets: an Espresso Granita.

I found this recipe in my copy of Entertaining by Donna Hay…so I’m still keeping with the spirit, if not with the deadline. I did try to make this like a sorbet and whip the coffee mixture in a metal bowl at intervals between freezings, as opposed to scraping with a fork in a pan. I think the composition is too different from a sorbet though, so it still ended up granita-ish more than sorbet-esque.

Espresso Granita
(adapted from Entertaining by Donna Hay – I halved the recipe)

  • 1 ½ cups hot water
  • ½ cup caster sugar
  • 1 cup freshly brewed strong espresso

- Place the water, sugar, and coffee in a saucepan over low heat and stir until sugar dissolves. Bring to a boil and allow to simmer for about 2-3 minutes.
- Pour into a metal bowl and let cool. Cover and place in the freezer for 3 hours or until half-frozen and icy. Beat well with a wire whisk to break up the ice crystals. Return to freezer.
- Remove from freezer after 1-2 hours and beat again. Do this about 2 to 3 more times.

This is oh-so-very the thing to have on a hot afternoon! The coffee flavor was too strong for C but just right for me. I would love to serve this after a long and heavy Sunday lunch as a light cap. Or even after a quickly thrown together weekday dinner with friends. It’s light on the tummy, strong on the coffee (well, depends how strong your brew is), and cool on the palate – a perfect way to end a meal with finesse! Or to keep cool on a day when you can’t make heads or tails of the weather…

Brussel Sprout and Camembert Gratin in Butternut Squash

title
I was rushing to leave the market last weekend, lugging an impossibly heavy load on my shoulders, sweat dripping down my back. The sun was blazing and I had a lot to drag home in preparation for Sunday lunch with my mom, her mom, and her mom’s sister (doesn’t that sound like a fabulous movie title?). It was in this frazzled state that I saw it. A squash unlike the regular local squash I am used to seeing at the market. A squash whose vase-like shape and pale color looked tantalizingly familiar. Could it be? Here in my tropical isle that has never seen an autumn much less a winter?

Despite having both arms full and feeling like you could fry an egg on my back, my feet had a will of its own and led me to the cardboard box holding the squash. I pointed and asked the purveyor what it was. “Butternut squash.” Now, let’s not get too excited. These were dwarves compared to the ones I’ve seen in pictures (yes, I have only seen butternut squash in pictures). I was a bit suspicious. “For eating?”, I asked, wanting to make sure these weren’t just bigger versions of the mini-squashes that seem to be quite en vogue as a tabletop decoration. “Yes”, was the reply. They apparently came from Baguio, our mountain province where a lot of our veggies, especially those needing cooler climes, come from. One second of deliberation, some picking and inspection, and I walked away with two small specimens.

Back home I went straight to my April/May 2007 issue of Donna Hay that featured a full spread on pumpkins. I already knew I would be making pumpkin soup with one of them, now I needed an idea for the other. As always, Donna did not disappoint me. Since the squash was small I figured they would do nicely stuffed, and Donna had just the recipe: Silver Beet and Gruyere Gratin. Unfortunately, I did not have silver beet (Swiss chard), nor did I have gruyere, and the pumpkin she used was golden nugget.

Technicalities. I did have some brussel sprouts (I love you brussel sprouts!) and the size of the butternut squash would be perfect. I prepared the sprouts like Molly’s cream braised ones (incredible recipe!), I just didn’t braise them (to allow for the added cooking time in the oven), and used that to stuff the squash. Although I didn’t have gruyere, I did have some wonderful camembert de Normandie (Bernieres Jort -- where they are still made with raw milk scooped by hand held ladles – au lait cru muolé à la louche), straight from France, a gift from my best friend K’s husband. I got to work.

Brussel Sprout and Camembert Gratin in Butternut Squash
(Inspiration taken from Donna and Molly)

  • 1 small butternut squash (approximately 550 grams)
  • 210 grams brussel sprouts
  • 30 grams butter
  • 100 ml cream
  • About 4 slim slices camembert cheese
  • Sea salt
  • Freshly cracked black pepper
  • Freshly grated nutmeg
  • Fresh marjoram (for garnish)

- Melt butter in a saucepan, and then toss in brussel sprouts. Gently fry until sprouts have browned in spots.
- Add cream to the pan and season to taste with salt and pepper. Grate some nutmeg on top, stir, and cover for a couple of minutes. Once sprouts have softened a bit, remove from heat and set aside.
- Cut squash in half lengthwise. Scoop out all the seeds and stringy parts.
- Place squash halves on a baking sheet. Fill the squash hollows with brussel sprout mixture, grate a little more nutmeg on top, and top with 1 slice camembert each. Wrap each squash in foil and place baking sheet in a 190C oven. Bake for 40 minutes to 1 hour, or until squash is soft.
- Once squash is soft, remove foil. The cheese would have melted into the sprouts at this point. Turn on the broiler. Place another slice of camembert on each squash half and place under the broiler until brown and bubbly.
- Garnish with marjoram leaves. Serves two.

When I was done eating, all that was left was a thin piece of pumpkin skin. The squash was sweet and not as wet as our local varieties. I am beyond happy I spotted them. Although I can’t be sure how this would compare to butternut squash in the Western Hemisphere, for now this is as good as I get. You can be sure I will be hounding that market stall for weekends to come.

back to school This is my entry for Weekend Herb Blogging, a fantastic event created by Kalyn of Kalyn’s Kitchen. This round is hosted by Chris of Mele Cotte.

Happy 4th of July to those of you that celebrate it! Over here we celebrate C’s birthday on July 4! :) Happy Birthday C!!!