Perfect Party Cake...Do I Dare?
A funny thing happened on the way to the Perfect Party Cake.
I waited until the last minute.
I had no time to make buttercream.
My batter was suspiciously liquid-y.
My cakes were as thin as my checkbook...and as dense as that high school prom date you want to forget.
Since the Daring Baker challenges are given at the beginning of the month, and posted at the end, I tend to take my sweet time, thinking I have all month to do it. Before I know it, posting date is tapping at my shoulder and no baked challenge in sight! Gasp! Thank goodness Morven, this month's host, gave us a lot of leeway when in came to her challenge. And what a wonderful challenge it was -- Perfect Party Cake by Dorie Greenspan! A lovely layer cake by none other than that goddess of baking who has gifted multitudes of home bakers with delicious creations, attempt after successful attempt. Now it was my turn!
But as I said, something funny happened on the way to the Perfect Party Cake.
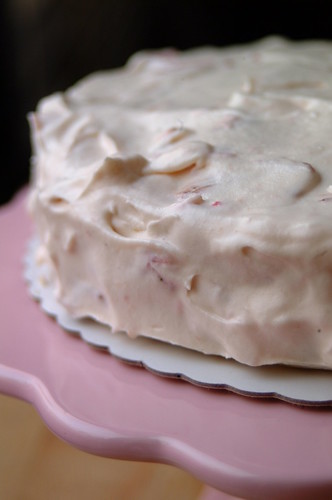
Because I waited until the last minute, I didn't make the buttercream. Although substituting this with whipped cream was allowed, I still felt cheater-y. Don't take away my badge please!
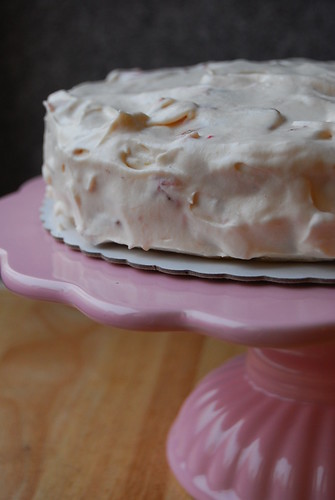
I read and re-read the recipe, but I knew something was going terribly wrong as my runny batter listlessly pooled at the bottom of my cake tins. As feared, the cakes came out flat and dense (and not the good kind of dense you get from a flourless chocolate cake but the bad kind of dense you get from an old rubber tire)...not light and sponge-y as I dreamed they would. They were so thin I couldn't even split the layers (unless I wanted to end up with a crepe cake). So I ended up with a 2-layer cake instead of a 4-layer one.
And we all know that Dorie's recipes are fabulous! And pretty much all the Daring Bakers turned out beautiful cakes (see them here!). So guess who futzed out on her watch? You got it.
Sigh...so I did what I often do when life's inevitable problems appear. I covered it up in sweetened whipped cream (tinted a light pink with mashed strawberries)! Have you ever tried covering your problems/too-tight jeans/mountain of laundry/irritating politicians in pink, sweetened whipped cream? I highly recommend it!
Don't think I have given up on the dream of a layer cake though. I fully intend to make a successful one no matter how many layer cakes get harmed in the process. Because really, when it comes to baking, what I think matters most in the final tally, is not how many disasters you endured, nor how many triumphs you enjoyed, but the fact that you dared to do it at all :)
Labneh (or labnah/labna) - Yogurt Cheese
I wanted to share with you one of the things I made for my farm holiday last weekend, since I couldn’t have you all with me. Which is a shame because what a wonderful holiday that would have been huh? :) A bunch of food loving individuals filling their tummies and then talking incessantly about it! This way, I can at least share some of what I ate…
I put together a spread of different meze for our Greek inspired dinner, and although I’d like to share recipes for each dish, most were done based on feel and whim…so no exact quantities for now. This, however, is beyond simple to do and a great thing to have in your appetizer tray (or anywhere else for that matter). And if you love yogurt as much as I do, I’m sure you will always have extra portions with which to make this.
Labneh (or labnah/labna), also called Arab Yogurt Cheese, is plain/natural yogurt strained of its whey. The longer you strain it the thicker it will be. It is criminally simple to make…all you need is good yogurt, some salt, a cheesecloth, a strainer, and some patience. After exerting as much effort as you would to, say, take a nap or decide what top to wear, you will have a creamy “yogurt cheese” (like a light, fresh cream cheese with the yogurt’s distinct sour note) to do with as you please!
Although simple, I still perused a bunch of recipes before proceeding. I am just a little geek that way. There was one in my copy of The Arab Table by May Bsisu (nice book with great explanations and lists of Arab ingredients!) and I found two recipes from Donna Hay! Doesn’t she just think of everything? ;) One recipe comes from her book Entertaining (with lemon thyme and chili) and the other come from her magazine issue # 35*** (with oregano and black peppercorns).
It’s quite basic so I’ll just give the main guidelines (no recipe really) I used based on the different recipes and you can improvise depending on the flavors you like.
Labneh
- About 1 teaspoon salt for every 2 cups plain yogurt
- Herbs and spices that you like
- Olive oil
- Mix the yogurt and salt together. You can add flavor at two points – either mix in your spices/herbs with the yogurt now, or add them to the oil later.
- Line a sieve with fine muslin/cheesecloth and place over a deep bowl (you don’t want your yogurt to come in contact with the liquid that has been drained). Place the yogurt mixture into the sieve. Cover the lot and place in the fridge to drain – this can be anywhere from 6 hours to 5 days! The longer it drains the thicker it will be.
- After it has drained to the consistency you like, you can scoop them up by tablespoons and form into balls (this is what Donna does). Place balls in a jar and, if you didn’t add them to the yogurt in the beginning, toss in the herbs/spices, then cover with olive oil. Store in the fridge.
- Another way of forming the cheese (May’s method) is to press onto a plate with the back of a spoon, causing little indentations in the cheese (like how hummus is often served). Drizzle olive oil into the indentations and sprinkle za'atar or dried mint (again c/o May) all over the cheese.
You could also have this for breakfast! See the breakfast spread Barbara put together with labneh.
***It was part of a terrific feature called “a dairymaid’s tale” which included recipes on how to make your own ricotta, curd cheese, clotted cream, and yogurt! Absolutely gorgeous white-on-white-on-white food styling too!
Weekend at the Farm
I'm back from our holiday weekend farm escape! As always, and I'm sure many know the feeling, greeted by a mountain of work on my desk. Aside from work-work, I've also got a bit of fun-work to prepare for...nothing earth-shaking but I'm excited nonetheless :) If all goes well, I hope to share it with all of you soon!
Meanwhile, I hope this bunch of photos from our weekend will keep everyone entertained. This isn't a huge farm with cows and pigs and crops and such -- just some chicken and their eggs, a pool, trees and grass and real birds that chirp in the morning...you know, that of which I am so sadly starved in the city.
The house is done in old Filipino style. It was lovingly put together by my mom-in-law, using choice bits from old, ancestral homes in the north (from Ilocos) that were either falling apart or being torn down. A door from here, a table from there. I like to think she saved these pieces about to be swallowed up by time, and they've now found a new home with new people to love them.
We were a big group of family and friends so there was a lot of laughter and good times. Swimming, poker, siesta, chatting. There was also a lot of food! Jollof rice and a spicy okra stew from a friend who grew up in Nigeria, grilled fish caught by her husband, barbecued burgers and sausages with all the fixings, fish tacos (for Good Friday!) with homemade guacamole and salsa (and these pickled jalapenos!), and our Greek-themed dinner with prawns (in garlic, lemon, parsely, and feta - recipe from Tessa Kiros) and crispy fried sardines (a Donna Hay recipe! I used fresh tawilis -- a freshwater sardine found only in the Philippines!), Greek salad and vegetable skewers, and a bunch of mezze (the olives, hummus, melitzanosalata, labneh, pita). We also had mum-in-law's callos a la Madrilena and steamed mussels.
Not all in one meal people.
Sigh...I wish all weekends could be like this! I hope you all had a fantastic Easter, if you celebrate it, or a wonderful weekend with people you love! :)
Green Olives with Coriander Seeds
Our hot blooded summer has definitely arrived. As I sit here and type, the morning sunlight streaming through my window has that fierce quality only summer sunlight here has. I squint even if I’m not looking directly at it. And the heat…oh boy. We have gone from slow roast to flash sear; the temperature shooting upwards with no thought for the poor creatures (like me!) it singes and melts along the way.
Summer is here. I can almost hear the sizzle as my flip-flops hit the pavement.
Time to escape the city!
Summer is the time for fresh mango juices dribbling down your chin, for digging your toes into the sand, for the sting of salt water or the blessed coolness of the pool. It’s the time to find a way out of the concrete jungle and into a place where you can still hear the birds as you nap. And, although I am all grown up and no longer have the luxury of a summer vacation, it is the time to find ways to slow down (because god knows you can’t go any faster in this heat!) over an ice cold rum+coke, if only for the weekends or the warm summer nights.
Luckily, the long Easter weekend is almost upon us and we will be out of the stifling city heat for a while! We are not dashing off to the beach; more’s the pity, but just to my mum-in-law’s farm outside the city. While it doesn’t have the sea nor the sand, it does have a pool, cool nights, a house with gorgeous wooden floors that never get hot (and are heaven to walk on barefoot), and a lovely kitchen for me to play in! Plus a white canopy bed where, I swear to you, I have the best naps of my life.
So right now, I am trying to get all my work done, at the same time making sure all the supplies for our farm visit are sorted. I’m also in a tizzy preparing as much do-ahead dishes as I can so I can relax and enjoy the nice kitchen with just a dish or two or three :)
This is one such do-ahead thing. I love marinated olives and think they are perfect cocktail food. Over here though, good-quality pre-marinated olives are a tad expensive, and really, make no sense when you can easily be marinating your own for a fraction of the cost. This recipe is one of the several I like (although it’s just as easy to wing it in the marinated olives department).
Green Olives with Coriander Seeds
From Tessa Kiros’ Falling Cloudberries, page 154)
- 500 grams green olives in brine
- 1 1/2 lemons
- 3 teaspoons coriander seeds
- 2 garlic cloves, crushed
- 125 ml olive oil
- Pit the olives by placing them on a chopping board then pressing down on them with the flat blade of a large knife. You don’t want to crush them to bits, just crack them open so you can remove the pits. Place olives in a bowl and discard pits.
- Cut four or five thin slices from the lemon half (discarding any pips) and add to the olives.
- Roughly crush the coriander seeds in a spice grinder or coffee grinder, or using a mortar and pestle. Do not grind them to a powder; you just want the seeds cracked so they release their aroma. Add this to the olives.
- Juice the other lemon and add to the olives, along with the garlic and the olive oil. Season with pepper. Taste first before adding any salt as the olives are probably salty enough.
- Mix everything well and leave to marinate for at least an hour before serving. This will keep for a week in the fridge (covered).
I like this recipe because I love the aroma and flavor of coriander seeds. Tessa says this is a typical Cypriot preparation. If you are too lazy to pit the olives, then leave them unpitted, or, like I did here, only pit some of them. This is great for a cocktail party because you can make it ahead (it will actually get better and more infused if you let it sit overnight) and have it on the table when your guests arrive – distracting them and giving you time to finish up the more a la minute stuff.
This is going with us to the farm, along with other goodies, as part of a Greek dinner we are preparing. We are in charge of Friday lunch and dinner – dinner will be Greek-themed and lunch will be Mexican. All seafood! I hope to have some photos to show when I get back :)
Nutella Banana Muffins...in pink
I’ve always been a girly-girl. Whether by nature, by nurture, or by fate, my internal compass always points to an undeniably feminine North. Pink is my favorite color (well, pink and gold actually). As a child, I loved dolls. Yes, Barbie, I’m not ashamed to admit. I collect ribbons. I love earrings…especially ones long enough brush my shoulders. I owned a hoop skirt when I was a kid…and I used to prance around the garden in it, pretending to be Scarlett O’hara.
It could be argued that I am absolutely and positively awful at anything athletic, thus leaving me no choice but to be girly or be scorned, but I think my intentions were sincere.
There were times though that I hid it. I hid it under black clothes and loud music and sarcasm. But still. It lived and it thrived. It would not be denied.
Then one fine day, somewhere in between the angst of adolescence and the cusp of adulthood, I realized: I’m girly and I don’t care what anyone thinks! Pink is my favorite color! PINK is my favorite color!!!
You know what I discovered then? You can be girly and pink and Barbie…and also be rock and smudged black eyeliner and sharp wit. In this day and age, we can have our cake and eat it too!
And if you know your way around the kitchen, that takes on a deliciously literal aspect.
Case in point: Let’s say you like bananas and banana bread. You also like Nutella and anything with Nutella…especially cupcakes. Plus, you want to use your pink cake stand and pink argyle cupcake liners.
No problem.
I knew I had to make these Nutella Banana Muffins as soon as I saw the recipe on Delicious Days. It has everything I could hope for in a cupcake/muffin (ok, except for this)! I made them for an afternoon tea I had a while back with my dear bookstore friends. Instead of making the chocolate coating though, I frosted the cupcakes with more Nutella. A bit much? I don’t think so. Because of the way Nutella seems to disappear on me when I bake it, I thought a little bit of uncooked Nutella insurance was called for!
A chocolate, Nutella-y, banana bread all dolled up in pink argyle cupcake liners…what more could this girly-girl want? (ok, I know!) Baking your cake and eating it too is truly priceless.
P.S. I still like black clothes (very slimming!) and loud rock music. I still suck at sports. I still like sarcasm (although maybe not as “out loud” as before). I still smile when I pass Barbie in the toy store. I no longer own a hoop skirt but I still pretend to be Scarlett O’hara sometimes :)
P.P.S. Have anyone seen this? What a super idea! Whether you're in pink or in black or in anything in between…Girls Rock!
Paho in Brine
I grew up with no concept of seasonal eating. I blame this on the fact that I don’t have four distinct seasons. Ok, there may have been other reasons, but leave a girl to her illusions.
Over here we have two seasons: Wet (rainy) and Dry (summer…i.e. superduperhot). In truth, I really have no factual evidence to back up my theory other than having two less seasons must have some sort of effect on our agriculture. And this effect must have somehow caused me to totally ignore any change in fresh produce during my tender years. And as such, I blithely ate anything I wanted, whenever I wanted, for most of my life.
Then one particularly hot summer I found myself in Dijon, France looking for (well, what else would I be looking for in the capital of Burgundy?) beef bourguignon. Oops. Yes, French chef sets island girl to rights. You can just imagine.
My first response was rebellion. What?! I actually had to wait to eat something??? Why? My home’s wet-dry cycle didn’t really explain as much as, say, a summer-winter-spring-fall cycle could. But slowly I learned. I’m learning to be more sensitive to what is at it’s best and when. I scour the internet for information on our local produce’s seasonality. I pay attention at the market to things that seem to be in glorious abundance while others suddenly go in hiding. I also check out local food magazines and market blogs for the latest on what’s in season now (you know, just like fashion).
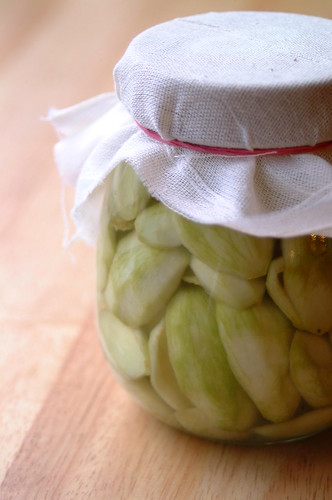
And it was while checking on one of my favorite local blogs that I found this! Paho! Complete with his “at the markets now!” heralding…designed to get us running to the nearest market. Paho is a small mango (sold green) that is a species all on its own, not a baby mango picked before it’s full grown. You can read more about it here. It is unforgiving in the sour department, making your lips pucker up and your eyes squint in what looks like pain, but is really pleasure, trust me. They also have a heartbreakingly short season (from a few weeks to a month!) so I was wasting no time. I rushed out at first opportunity to go and be seasonal! Wooo!
I really like paho (brined paho was a favorite in my grandmother’s house when I was little)…so don’t think I was just trying to be fashionably seasonal…though I am human most of the times, fashionable some of the times, so I do succumb once in a while ;)
I brined my paho as per instructions here. They now sit in my fridge waiting for the perfect opportunity to bust out in all their beguiling sourness…
What’s next in my basket this season? Strawberries! Mangoes!
What’s in season at your market now? :)
This is my entry to this week's Weekend Herb Blogging, created by Kalyn atKalyn's Kitchen and hosted this week by Green Olive Tree!
HHDD #18: Coconut Chocolate Tarts
I'm late, I'm late, for a very important date!
That would be the deadline for Hay Hay it's Donna Day #18, the round hosted by the uber-charming Bordeaux, winner of the HHDD round (Pizza!) that I hosted. Ack! You know the drill, this-that-and-their-brother just pulling at me in all directions. The only thing missing is my stress-spot (do you get these? a mysterious red dot on your face? I always do!). Anyhoo, no excuses! Here is my entry for this month's round of HHDD! :)
Bordeaux chose Coconut Chocolate Tarts as the theme (recipe taken from Donna's book New Fast Food -- which I have yet to procure!). The coconut comes in the crust -- a delicate thing made with flaked coconut, sugar, and egg whites. This is topped with a dark chocolate filling and then popped in the freezer for a bit to set. Bordeaux gives us leeway to expand and adpat the theme as much as we want...so I decided to play around a bit.
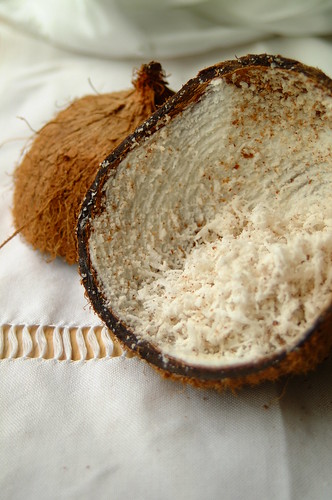
Instead of the coconut crust, I used a regular pie crust (the same one I used for this lemon meringue pie) and pre-baked them in a muffin tin. I used the same recipe Bordeaux provided for the chocolate filling. And for the coconut? I decided to celebrate the abundance of coconut we have been blessed with over here by using freshly grated coconut (yes! available at a grocery or market near you!)! I also wanted to add another element in the tart and decided to use sweetened condensed milk. I know, I can abuse my right to sugar sometimes. But I have my reasons! There was this simple snack we were taught to make in high school which consisted of white bread dipped in condensed milk, then dredged through freshly grated coconut, then toasted in the oven. Really, it sounds strange, but it was delicious! So I wanted to use some of that combination here.
So here is how my tart went: Make crust. Cool. Drizzle a layer of sweetened condensed milk on the bottom of the crust. Top that with freshly grated coconut. Top with chocolate filling. Set as per instructions. Eat and enjoy!
Phew! Made it!
Thanks Bordeaux for be such a great host! Thank you Barbara for creating this event! And thanks to the powers that be for blessing me with all this coconut! :)
And a very special thank you for a amazingly beautiful new cousin that entered the world yesterday! Welcome to earth T and I promise to make you lots of tarts and goodies as soon as you can have them!!! :)
Lasang Pinoy 24: Laing
I fell in love in Bicol.
During my visit there last year, my friend K and I fell madly in love with the region’s culinary trifecta – Laing, Bicol Express, and Pinangat. All three dishes proudly bearing the two elements that Bicolano food is famous for – gata (coconut milk) and chili. Our kind hosts would valiantly try to make us eat other dishes, but we were having none of it. Really, it was unusual for us to have blinders on when it comes to food, but we could not see beyond those three dishes, devouring them with an almost angry passion. And K doesn’t even care for food that is too spicy! How do you explain that?
To this day K and I keep our eyes and noses on red alert for fine Bicol fare. We text message each other fervently when we chance on something promising and do many taste tests. When K’s nose and palate sense a good find you will hear her say softly and sweetly, “Hello friend!”
Bicolano food has me whipped good and proper. It has wound its coconut milk and chili tentacles around me and refuses to let go. And I’m not struggling.
I’m making my own.
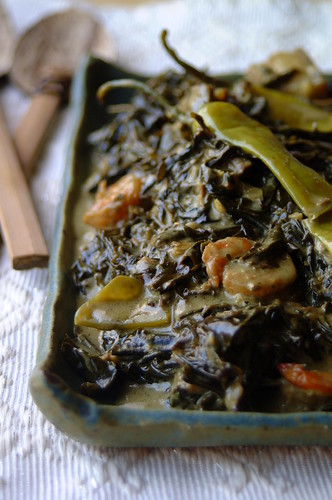
Laing (pronounced lah-ing)
(adapted from Flavors of the Philippines by Glenda Rosales-Barretto)
- 100-150 grams “dried laing” (dried gabi/taro leaves)
- 250 grams pork belly, boiled for 5 minutes and diced
- 200 grams shrimp, shelled and deveined
- 1 onion, chopped
- 2 1/2 tablespoons chopped ginger
- 125 grams bagoong alamang (shrimp paste)
- 50-60 grams long green chilis (sili pangsigang), depending on how spicy you want it, half cut in two, half left whole
- Freshly ground black pepper
- 1 liter coconut milk
- 400 ml coconut cream
- In a bowl, mix the pork, shrimp, onion, ginger, bagoong, the cut-up chilis, and the coconut milk. Pour this into the pot, over the leaves, and season with freshly ground black pepper.
- Bring to a boil, then reduce heat and simmer for 30 minutes. Don’t stir…just press down on the leaves every once in a while so it soaks up the liquid.
- Add the whole chilis and the coconut cream and simmer for 5-10 minutes. Stir gently to make sure all is incorporated without mashing the leaves too much.
I based my recipe on the one found in Flavors of the Philippines by Glenda Rosales-Barretto…which incidentally (drum roll please) is my very first Filipino cookbook! I love cookbooks, but when it comes to Filipino food, relatives and friends seem to be much better sources of recipes than any book could. But it bothered me that I didn’t own even one local cookbook, so with the recommendation of a friend, I chose this one. I like it because it has a little bit from each region – Bicol included (yay!). I’ll be exploring more of this book soon :)
Glenda (first name basis already!) uses fresh gabi leaves and stalks, but I used dried (you can find this in the groceries labeled as “dried laing” or “dried gabi”). If you want to see fresh gabi leaves check here. I used the dried version because, aside from it being easier to find, fresh gabi leaves require special handling…or else they make your throat itch like the devil! I know this firsthand. Imagine thorns suddenly sprouting on the inside of your throat. You get the idea. Dried gabi leaves for me, thank you. I also used less chilis than in the original recipe and didn’t add any sili labuyo (our oh-so-spicy bird’s eye chili). This will make a fairly mild laing with just a touch of spice. Add more chilis, or use sili labuyo, to increase the heat.
Of course, K is the first person I text message when I see my brew starting to resemble the laing we know and love. I have a big batch, so I can give her a fair amount of takeaway. She comes over as soon as work is done with hot, steaming rice in tow and sits down to try my first ever laing.
Hello friend! :)
This is my entry to Lasang Pinoy 24: Loco over Coco hosted by Kai of Bucaio. I’m late! But I couldn’t miss this round…I love coconuts! :)